Hi everybody!
This is my first 2020 post!
In this post i decided to show you how quickly you can build a shopping cart app using latest Angular8 and using as less code as possible...
Also
I will touch some interesting (at my point of view) consepts during this tutorial, like:
Planning
Of course before starting actually coding you need to have a clear picture in your mind of: how exactly the thing you want to build should look and how it should behave. Better way is to take a pencil and paper and draw a quick sketch. So here a wireframe i have drawn:

- Pressing on each one of product`s 'plus' button - will make the product appear inside shopping cart.
- Each product instance at shopping cart has a "quantity" field where you can see how much units of this product is ordered, you can increase/decrease units number by pressing "up" or "down" arrows (you can as well press 'plus' button at some product at "product list" one more time to increase the units number)
- If number of units is 0 - the product should no more appear in the shopping cart.
Starting to Code (Or, more correctly - where i start to coding)
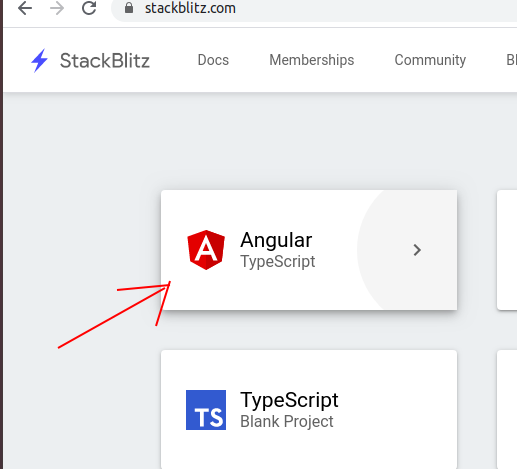
For this post i will not use any traditional IDE like webstorm or vscode. Instead i will use online stackblitz editor.
Why? you may ask
- Because you dont need to download & install anything on your machine
- Because you dont need to wait until dependencies installed(at least at my comp the installing deps is more more slower then in stackblitz)
- Because the future is to have all you need online (and we want to be a future guys, are we?)
- Because it is how i will place a running demo in this post
Start coding already!!!
Ok, lets start a new angular Project.
(Try to do it using ng new my-project and see how much time is takes...)
Here we have already a "hello" component, lets rename it to ProductListComponent
Remember to Modify the code of app.module.ts file accordingly:
import { AppComponent } from './app.component';
// replace "hello"
import { ProductListComponent } from './product-list.component';

@NgModule({
  imports:      [ BrowserModule, FormsModule ],
  declarations: [ AppComponent, ProductListComponent/*also here*/ ],
  bootstrap:    [ AppComponent ]
})
export class AppModule { }
1. rename the "name" input by "products"
2. change "selector" property to "product-list"
3. change markup at app.component.html to use "product-list" instead of "hello"
import { Component, Input } from '@angular/core';
@Component({
  selector: 'product-list',
  template: `
  <h1>Products List</h1>
  <div *ngFor="let product of products">{{product.name}}<div>
  `,
  styles: [`:host{border: 1px solid #000;}`]
})
export class ProductListComponent  {
  @Input() products: any[];
}
lists: productList and cartPorductList:
export class AppComponent  {
 productList = [
   {name: 'Z900', price: 8799},
   {name: 'shubert helmet', price: 999},
   {name: 'sport gloves', price: 99}
  ];
 cartProductList = [];
}
<product-list [products]="productList"></product-list>

Shopping Cart
In a same way we have created "PorductList" component - we will create now a "ShoppingCart" component. Just copy the "product-list.component.ts" and modify it accordingly:
@Component({
  selector: 'shopping-cart',
  template: `
   <h1>Shopping Cart</h1>
  <div *ngFor="let product of products">{{product.name}}<div>
  `,
  styles: [`:host{border: 1px solid #000;}`]
})
export class ShoppingCartComponent  {
  @Input() products: any[];
}
(Dont forget to register this component at app.module file too!)
Side By Side
Now we should make both - ShoppingCart and ProductList components to located side by side at parent (AppComponent) template.
There is a lot of various ways to implement this layout, and i will choose what i consider a most advanced and convenient way - the css-grid of CSS3 layout system:
Just place the following css code in app.component.css file and you done:
:host {
  display: grid;
  grid-template-columns: 1fr 1fr;
  grid-column-gap: 10px;
}

If you new to grid-css feel free to read more here about grid-css techniques
Product Component
We may place the name price and "+" button at ProductList component template as well, but, i think - it will be more readble to place the markup and the logic into its own encapsulated component - the ProductComponent.
Lets create and register it again the same way we did with previous two components:
import { Component, Input } from '@angular/core';

@Component({
  selector: 'product',
  template: `
  <div>{{product.name}}/<div><button>+</button>
  <div>{{product.price}}/<div>
  `,
  styles: [`:host{border: 1px solid blue;}]`]
})
export class ProductComponent  {
  @Input() product: any;
}
// also lets modify the template of parent "ProductList" to use "product"
 <poduct *ngFor="let product of products" [product]="product">
 </product>
Now look at the output...

But, lets use the same grid-css trick here! (just copy from app.component.css, paste to product.component.ts at "styles" section) and change the second "1fr" to "auto":
styles:[`
:host {
  display: grid;
  grid-template-columns: 1fr auto;// change the second "1fr" to "auto"
  grid-column-gap: 10px;
}
div:nth-child(1) {font-weight: bold;}
`]
And look: the things magically jumped right into their places!

One lust little thing:
Lets prettify the way the price displayed using cool "toLocaleString" es6 feature:
<div>{{product.price.toLocaleString('en-US', {style: 'currency', currency: 'USD'})}}</div>

One way data flow
Lets talk a little bit about architecture. Currently our component structure is a tree, where "app" component uses as a root of the tree, its children is products and shopping cart and each of them should have its own children:


We will use for this the Output & EventEmitter features of angular:
Lets add following code to product component
export class ProductComponent  {
  @Input() product: any;
  @Output() productAdded = new EventEmitter();
  addProductToCart(product) {
    this.productAdded.emit(product);
  }
}
// Also lets modify the template of product component by adding the clickHandler:
  <div>{{product.name}}</div><button (click)="addProductToCart(product)">+</button>
export class ProductListComponent  {
  @Input() products: any[];
  @Output() productAdded = new EventEmitter();
  addProductToCart(product) {
    this.productAdded.emit(product);
  }
}
// also update template:
  <product *ngFor="let product of products" [product]="product" (productAdded)="addProductToCart($event)"></product>
app.component.ts:
...
 addProductToCart(product) {
   this.cartProductList.push(product);
 }
// template:
<product-list (productAdded)="addProductToCart($event)" [products]="productList"></product-list>

How about use Service?
Yes, it is good you asked. Actually, angular gives you ability to make data accessible to all level of components by using services. This is alternative architectural approach, and each one has its advantages and disadvantages.
One of advantages of one-way-flow is - that is very clear who triggers the change detection (a mechanism which responses to data changes), Also - if we would use services - how would i blabber about one-way-flow to you?
Good exmple for usage of "reduce" array method
Shopping Cart list is different from a product list, because same product may be added multiple times, but it should be displayed only once, and display the quantity of items (times '+' button clicked)
Thus: we must change a logic of "addProductToCard" method of AppComponent:
Istead just pushing product to "shoppingCartList" we will push it only if product NOT exists there yet
If product already exsit we will update "num" field of this product:
 addProductToCart(product) {
   const productExistInCart = this.cartProductList.find(({name}) => name === product.name); // find product by name
   if (!productExistInCart) {
     this.cartProductList.push({...product, num:1}); // enhance "porduct" opject with "num" property
     return;
   }
   productExistInCart.num += 1;
 }
<h1>Shopping Cart ({{total()}})</h1>
// code
export class ShoppingCartComponent  {
  @Input() products: any[];
  total() {
    return this.products.reduce((acc, prod) => acc+= prod.num ,0)
  }
}
CartProduct Component
Lets quickly create the cartPorductComponent - it is almost similar to productComponent in its basics (its has 'product' Input too).
export class CartProductComponent  {
  @Input() product: any;
}
First: lets bind it to 'num' property of 'cartProduct' object, we will use angular [(ngModel)] directive
   <div *ngIf="product">
     <div>{{product.name}}</div>
     <input type="number" [(ngModel)]="product.num" min="0"/>
   </div>

Very close to finish.
Now for the last step:
What should happen when quantity is reduced to zero?
Right, product should removed from "cart".
Lets add "ngModelChange" directive to "quantity" input :
<input type="number" [(ngModel)]="product.num" min="0" (ngModelChange)="modelChanged($event)"/>
  modelChanged($event) {
    if (this.product.num === 0) {
      this.removeFromCart.emit(this.product)
    }
  }
shopping-cart.compontnet:
//template:
(productRemoved)="removeProduct($event)"
//code:
  @Input() products: any[];
  @Output() productRemoved = new EventEmitter();
  calcTotal() {
    return this.products.reduce((acc, prod) => acc+= prod.num ,0)
  }
  removeProduct(product) {
    this.productRemoved.emit(product)
  }
  removeProduct(product) {
   this.cartProductList = this.cartProductList.filter(({name}) => name !== product.name)
  }

