Showing posts with label component. Show all posts

1/13/18

Building A Dashboard Wiht Angular - Part3

Remember the dymanicComponent we started with?
Lets change it code so it will be able to display each of three widgets when a widget type passed as an "input" with its data:


import {Component, ViewContainerRef, ViewChild, Input, ComponentFactoryResolver} from '@angular/core';
import {VERSION} from '@angular/material';
import CompletedTasksComponent from './completed-tasks.component'; 
import EmailSubscriptionsComponent from './email-subscriptions.component';
import DailySalesComponent from './daily-sales.component'; 
@Component({
  selector: 'dynamic-cmp',
  template: `<div>
     here some dynamic stuff should happen
     <div #dynamicComponentContainer></div>  
  </div>`,
  entryComponents: [
    CompletedTasksComponent,
    EmailSubscriptionsComponent,
    DailySalesComponent
  ]
})
export class DynamicComponent { 
  componentRef:any;
  @ViewChild('dynamicComponentContainer', { read: ViewContainerRef }) dynamicComponentContainer: ViewContainerRef;
  constructor(private resolver: ComponentFactoryResolver) {}
  @Input() set componentData(data: {component: any, data: any }) {
    if (!data) {
      return;
    }
    let factory = this.resolver.resolveComponentFactory(data.component);    
    this.componentRef = this.dynamicComponentContainer.createComponent(factory);
    this.componentRef.instance.data = data.data; // passing data to component through input

  } 
}

Now the component data and the component type passed to dymanicComponent as input:

    <mat-grid-list cols="3" rowHeight="1:1">
      <mat-grid-tile *ngFor="let data of componentData">
        <dynamic-cmp [componentData]="data"></dynamic-cmp>
      </mat-grid-tile>
    </mat-grid-list>

Please see my first stackblitz embedd here:

6/7/17

Staring With Vue.js - Part 2 (Components)

It is well known fact that it better to have your frontend code splitter into incapsulated parts - the components. Almost all js frameworks are implementing webcomponents in some way. Vue.js is not an exception.

Creating Component

When we created list of first 5 popular books we used for each book representation few html elements:


 <div class="row">
    <div class="col-xs-4 text-center"  v-for="book in books">
      <a href="#" class="thumbnail">
        <img v-bind:src="book.img" width="200" height="276" >
        <span>{{ book.title }}</span>
      </a>
    </div>
  </div>  

Instead of having all those html elements with classes styles and attributes we can have only one component element

Book Item


In Vue you can easily create component in following way
Vue.component('book-item', {
  props: ['book'],//<--property
  template: `
  <div class="col-xs-4 text-center">
      <a href="#" class="thumbnail">
        <img v-bind:src="book.img" style="height:226px" >
        <span>{{ book.title }}</span>
      </a>
  <div>
  `
}); 

Notice that this component has binding property "book" from which it gets a book object - the book the component should display
Finally we can use our book-item component inside book repeater:

  <div class="row">
    <book-item :book="b" v-for="b in books"></book-item>
  </div>  

for viewing code, please look at this jsfiddle

1/18/17

Unit Tests In Angular2 - part 3 (Component That Uses Service)

In previous post we've learned how to test the angular2 component.
That was very nice and we have a lot of fun, but everybody knows that in real life many components may use services to bring data from server.
Lets demonstrate it on our user component:
Lets make it to display friends list of this user:


@Component({
  selector: 'my-app',
  template: `<span>name: <strong>Victor Savkin</strong></span>
   <hr/>
   <strong>Friends:</strong>
   <ul>
     <li *ngFor="let friend of friends">
       {{friend}}
     </li>
   </ul>`
})
export class App {
   
    public friends:string[]=[]
    constructor(private usersService:UsersService) {
    }
    ngOnInit(): void {
       this.usersService.getUsers().subscribe(
         users => {
           this.friends=users;
         },
         error=>console.log(error) 
       );
    }
}


And the code of UsersSerivice:

import {Injectable} from '@angular/core';
import {Http} from '@angular/http';
import 'rxjs/add/operator/map';

@Injectable()
export class UsersService {
  constructor(private http:Http) { }
  
  getUsers(){
    return this.http.get('api/users.json')
      .map(response => response.json());
  }
}


So How To Test This Thing?

Lets say we want to test that request populates the "friends" section with friends names.
Since it is bad practice to make real http request for testing purposes - we need to create a mock of UsersService:


import { Observable } from 'rxjs/Observable';
import 'rxjs/add/observable/of';
  
  class MockUsersService {
    public get() {return  Observable.of(['John', 'Steve']);}
  }

Once we have the mock of UsersService -lets inject it into the module instead of usersService:

  beforeEach(async(() => {
    TestBed.configureTestingModule({
      declarations: [UserComponent], 
      providers:[// <--HERE IS THE MAGIC!!!
       { provide: UsersService, useClass: MockUsersService}
      ],
      imports: [ HttpModule,BrowserModule ]
    })
    .compileComponents();
  }));

Great, inst it?
Now we can test the component and see if friends are displayed as planned:

  beforeEach(() => {
    fixture = TestBed.createComponent(UserComponent);
    comp = fixture.componentInstance;
    comp.user = new UserModel('Vasia','Kozlov')
    de = fixture.debugElement.query(By.css('span'));
    element = fixture.nativeElement;// to access DOM element
  });

  it('should have list of friends displayed inside UL',  async(() => {
    fixture.detectChanges();
    fixture.whenStable().then(() => { 
      expect(element.querySelector('li:first-child').innerText).toBe('John');
      expect(element.querySelector('li:last-child').innerText).toBe('Steve');
    })
  }));

you can see the full code on this plunker

1/10/17

Unit Tests In Angular2 - part 2 (The Component)

Testing The Component

In previous post we've learned how to test the model (Simple javascript object) and the Service in angular2. Now I think' we ready for next step:

How To Test The Component

Lets say we have a User Component which should display the full name of some user:
(user-component.ts):


import { Component,  Input} from '@angular/core';
import {UserModel} from './user-model'
@Component({
    selector: 'user-component',
    template:   `{{ user.fullname() }}`
})
export class UserComponent {
    @Input() user:UserModel;
}

This component contains @input annotation - which means the parameter from outside (named user) should be set

The Test

As in case of Service we should start with setup the module with testBed util:
(user-component.spec.ts):


import {UserComponent} from './user-component'
import {UserModel} from './user-model'
import { async, ComponentFixture, TestBed } from '@angular/core/testing';
import { By }           from '@angular/platform-browser';
import { DebugElement } from '@angular/core';

describe('UserComponent tests', function () {
  let de: DebugElement;
  let comp: UserComponent;
  let fixture: ComponentFixture;

  beforeEach(async(() => {
    TestBed.configureTestingModule({
      declarations: [  UserComponent ]
    })
    .compileComponents();
  }));

  beforeEach(() => {
    fixture = TestBed.createComponent(UserComponent);
    comp = fixture.componentInstance;
    comp.user = new UserModel('Vasia','Kozlov')// <--here we passing the outer parameter
    de = fixture.debugElement.query(By.css('span'));
  });

  it('should create component', () => expect(comp).toBeDefined() );

  it('should have fullname of user displayed inside "span" tag', () => {
    fixture.detectChanges();
    const h1 = de.nativeElement;
    expect(h1.innerText).toMatch(/Vasia Kozlov/i,
      ' should state user Full Name');
  });
});

As you can see - the outer parameter passed using fixture.componentInstance helper
You can view the running code on the plunker

11/1/16

Make React Component Code Shorter

In previous posts we created SearchPage component


class SearchPage extends Component {
      constructor(props) {
        super(props)
      }

      handleSearchTextChange(txt) {
        this.props.loadResults(txt);     
      }

      render() {
        const {results, loading} = this.props;
       
        return (
          <div>
            <SearchBar onChange={this.handleSearchTextChange.bind(this)}/>
            <ResultsList results={results} loading={loading}/>
          </div>
        );
      }
};   

This code is working but, is there a way to make it more nicer and also more shorter?

The answer is "Yes"

First lets get rid of redundant "handleSearchTextChange" method:


class SearchPage extends Component {
      constructor(props) {
        super(props)
      }
      /*   
      handleSearchTextChange(txt) {
        this.props.loadResults(txt);     
      }
      */
      render() {
        const {results, loading} = this.props;
       
        return (
          <div>//<-- instead of "this.handleSearchTextChange.bind(this)"
            <SearchBar onChange={ this.props.loadResults}/>
            <ResultsList results={results} loading={loading}/>
          </div>
        );
      }
};

or, even more simplier, lets take advantage of ES6 destructing syntax:

class SearchPage extends Component {
      constructor(props) {
        super(props)
      }

      render() {
        const {results, loading, loadResults} = this.props;//<--  loadResults method is one of the props too
       
        return (
          <div>
            <SearchBar onChange={loadResults)}/>
            <ResultsList results={results} loading={loading}/>
          </div>
        );
      }
};

React Trick

There is a way in react to write a component much shorter is it has no other methods except render :


let SearchPage = ({results, loading, loadResults}) => {  
  return (
    <div>
      <SearchBar onChange={loadResults}/>
      <ResultsList results={results} loading={loading}/>
    </div>
  );
}

Thats all,far much shorter !

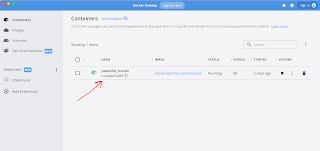
Getting started with docker

It is very simple to get started usig docker. All you need to do-is download the docker desktop for your system Once you get docker syste...